Symfony 6 tutorial. Symfony project setup and configuration.

Hi, this is a series of tutorials. On how to build a Symfony 6 application from scratch. Symfony 6 project setup and configuration.
Docker configuration
Let's start with the docker image. Let's create a Dockerfile
FROM php:8.0-fpm

# Copy composer.lock and composer.json
COPY composer.json /var/www/

# Set working directory
WORKDIR /var/www

# Install dependencies
RUN apt-get update && apt-get install -y \
    build-essential \
    libssl-dev \
    acl \
    locales \
    zip \
    vim \
    git \
    curl \
    nodejs \
    npm

RUN apt-get install -y libicu-dev \
    && docker-php-ext-configure intl

RUN npm install -g yarn

# Install extensions
RUN docker-php-ext-install pdo_mysql exif pcntl intl

# Install composer
RUN curl -sS https://getcomposer.org/installer | php -- --install-dir=/usr/local/bin --filename=composer

# Add user
RUN groupadd -g 1000 www
RUN useradd -u 1000 -ms /bin/bash -g www www

# Copy existing application directory contents
COPY . /var/www

# Copy existing application directory permissions
COPY --chown=www:www . /var/www

# Change current user to www
USER www

# Expose port 9000 and start php-fpm server
EXPOSE 9000
CMD ["php-fpm"]
Now let's make a docker-compose.yml file in the root directory. It should look like this.
version: '3'
services:

  #PHP Service
  application:
    build:
      context: .
      dockerfile: Dockerfile
    container_name: application
    tty: true
    environment:
      SERVICE_NAME: application
      SERVICE_TAGS: dev
    working_dir: /var/www
    volumes:
      - ./:/var/www
      - ./docker/php/local.ini:/usr/local/etc/php/conf.d/local.ini
    networks:
      - app-network

  #Nginx Service
  nginx:
    image: nginx:alpine
    container_name: nginx
    ports:
      - "80:80"
      - "443:443"
    volumes:
      - ./:/var/www/
      - ./docker/nginx/conf.d/:/etc/nginx/conf.d
      - ./docker/nginx/ssl/:/etc/ssl
    networks:
      - app-network

  #MySQL Service
  database:
    image: mysql:5.7.22
    container_name: database
    restart: unless-stopped
    tty: true
    ports:
      - "3306:3306"
    environment:
      MYSQL_ROOT_PASSWORD: ${DB_PASSWORD}
      MYSQL_DATABASE: ${DB_DATABASE}
      MYSQL_USER: ${DB_USERNAME}
      MYSQL_PASSWORD: ${DB_PASSWORD}
    volumes:
      - dbdata:/var/lib/mysql
      - ./docker/mysql/my.cnf:/etc/mysql/my.cnf
      - ./docker/tmp/database:/tmp/database
    command: mysqld --init-file="/tmp/database/init.sql"
    networks:
      - app-network

#Docker Networks
networks:
  app-network:
    driver: bridge
#Volumes
volumes:
  dbdata:
    driver: local
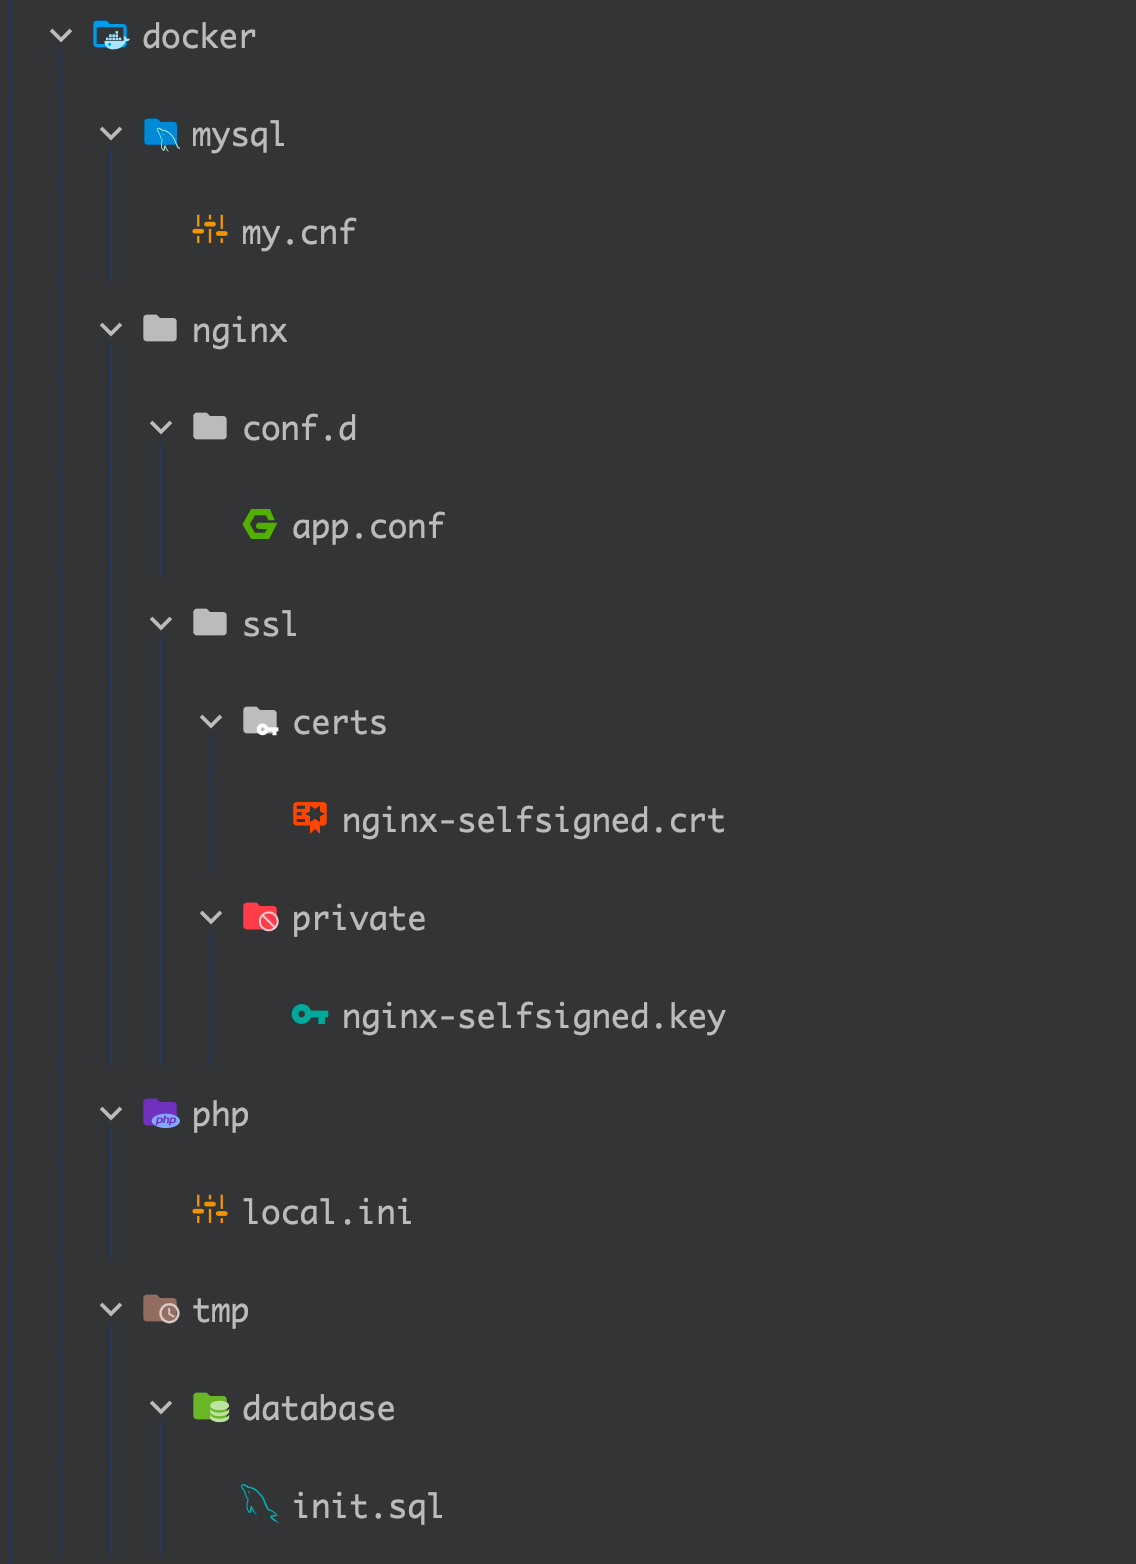
With docker-compose, I can build multiple containers and configure a database and a web server along with PHP. Also, you need to create additional folders in your root directory. The tree should look like this:

Now, I need to configure each container.
MySQL configuration
Create a docker folder in a root directory and MySQL directory, and my.cnf file.
Inside my.cnf you can add additional MySQL configuration; in my case, it's just an empty file. Also, create tmp/database/init.sql. This is just a SQL file with predefined commands to create a user and database. Here is what it looks like:
CREATE DATABASE mydatabase;
CREATE USER 'user'@'%' IDENTIFIED BY 'password';
GRANT ALL PRIVILEGES ON *.* TO 'user'@'%';
FLUSH PRIVILEGES;
If you want, you can change your password and username. Also, you can grant privileges to a single database. But for the dev environment, it's okay.
PHP
Next, php/local.ini add whatever PHP configuration you need, for example
upload_max_filesize=20M
post_max_size=20M
Webserver
Now we need to configure our web server, Nginx. I use NGINX because it's faster than apache, and it serves static files and data without PHP. Why would you use something else? So, create the main Nginx folder and two child folders - conf.d and certs.
Inside conf.d create app.conf and copy-paste this code:
server {
    listen 80;
    listen 443 ssl;
    ssl_certificate /etc/ssl/certs/nginx-selfsigned.crt;
    ssl_certificate_key /etc/ssl/private/nginx-selfsigned.key;
    index index.php index.html;
    error_log  /var/log/nginx/error.log;
    access_log /var/log/nginx/access.log;
    root /var/www/public;
    location ~ \.php$ {
        try_files $uri =404;
        fastcgi_split_path_info ^(.+\.php)(/.+)$;
        fastcgi_pass application:9000;
        client_body_timeout 3000;
        fastcgi_read_timeout 3000;
        client_max_body_size 32m;
        fastcgi_buffers 8 128k;
        fastcgi_buffer_size 128k;
        include fastcgi_params;
        fastcgi_param SCRIPT_FILENAME 	   $document_root$fastcgi_script_name;
        fastcgi_param PATH_INFO $fastcgi_path_info;
    }
    location / {
        try_files $uri $uri/ /index.php?$query_string;
        gzip_static on;
    }
}
I want to access my website via HTTPS. Thus I need to add certificates. You can simply generate them. I am not going to explain in detail how to generate them. But there is a great blog post on Digitalocean - how to create self-signed certificates. Take a look. And generate those certificates in the Nginx/SSL folder.
Run containers
Ok, now we are ready to start our containers. Run this command from the terminal.
docker-compose up -d
You should see something like this:

Symfony set up
Symfony is not installed yet. Now it's time to install the project. Let's connect to our application container via ssh.
docker exec -it application bashRun this command.
composer create-project symfony/website-skeleton ./project && cp -r ./project/* ./ && rm -rf ./project/
What it does is create a website skeleton. Then it copies the contents to our current folder and removes the project folder. This magic is needed because you only can install the project into an empty folder.
Let's init git repository here:
git initDon't forget to change /etc/hosts and add your hostname. In my case, it's a 127.0.0.1 tracker.local.com
restart nginx - docker exec nginx nginx -s reload
Now, update the database URL in .env file in the root directory.
DATABASE_URL=mysql://user:password@database:3306/mydatabase?serverVersion=5.7.22Since I will write frontend in the same project, I need to manage CSS/js files. For this, we need to install the Symfony Encore bundle. It will help manage all the Symfony assets.
Run these commands:
composer require symfony/webpack-encore-bundle
A few more things.
Run yarn install command. And create a first controller. You should run this command from the application container docker exec -it application bash .
./bin/console make:controller FrontendController
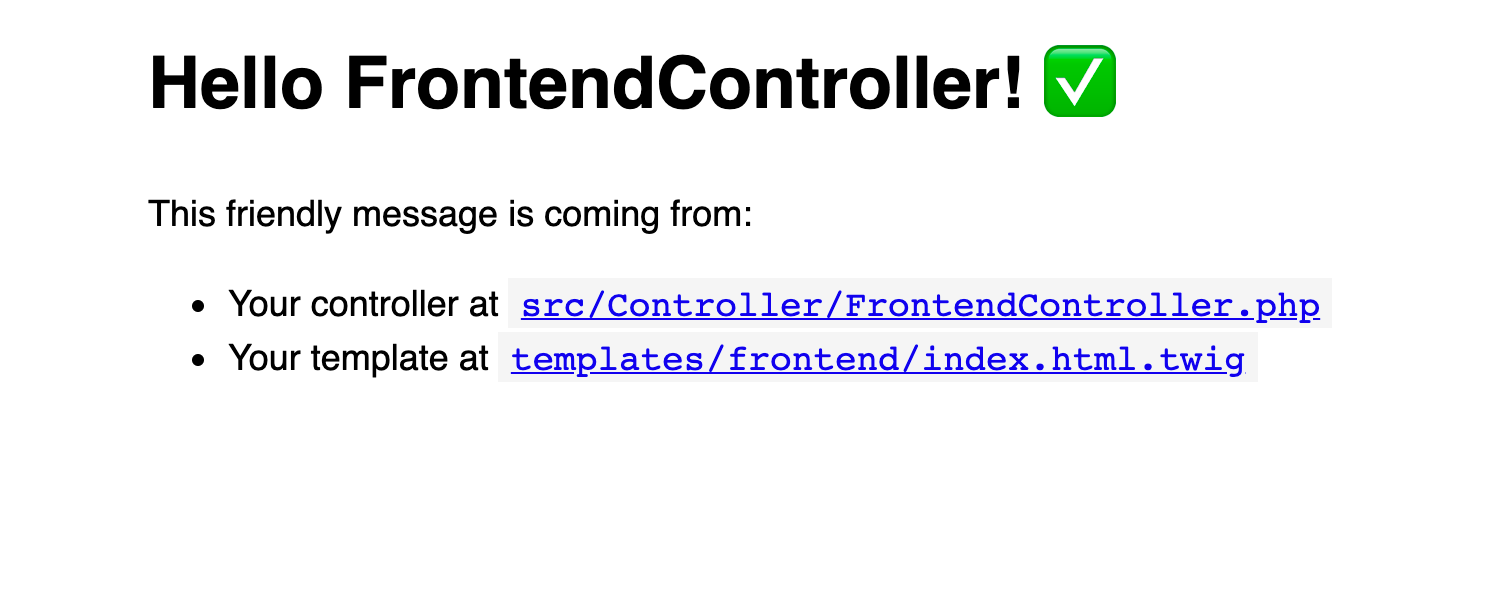
Open up your browser, and you will see this page:

Congratulations, your Symfony project is now set up. We can move on.
Let's move to the third part of the tutorial — front-end development. In the next chapter, I will build a simple vue.js application in a Symfony project. I think I will break it into several parts. The first part - login/signup with JWT authentication. I will configure the JWT bundle for this case. The next part would be a CRUD for tracking actions.
Read next - Frontend setup and configuration.
Back to Part 1


Member discussion